Table of Contents
Xray is a manual & automated test management app for QA in JIRA. The Integration provides traceability and result synchronization between Squish Test Center and Xray. The Integration allows you to manually map Xray tests to Squish Test Suites/Cases.
The Xray integration requires that there are no naming conflicts within the JIRA issue types (Jira Administration → Issues).
There should be only one issue type named Test, because the Xray Integration is using that keyword.
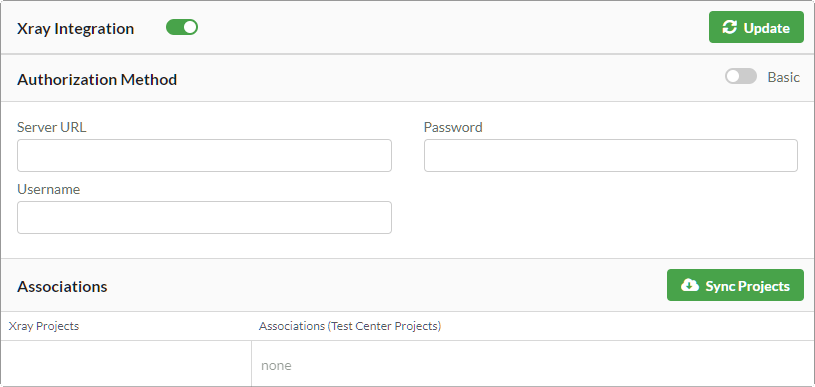
The Xray integration settings can be found in the Global Settings menu, this menu is only visible to admin users. The integration can be enabled via the toggle button next to Xray Integration.
 |
Adding Xray (JIRA) account information to Squish Test Center
The Xray integration supports Basic Authentication as well as OAuth 1.0a. You can use the toggle button next to Authorization Method to switch between the supported methods. If you want to use the OAuth 1.0a authorization method, please follow these instructions: JIRA Authorization Method (Section 4.4.1.1)
For Basic Authentication please configure the following options:
Server URL (which is the URL of your JIRA instance).
Username
Password
Use the Update Button to save the entered information.
After all the required data is entered and the Update button is clicked, the Xray projects can be fetched by using the Sync Projects button. When the projects are synchronized they will appear in the Associations list of the integration settings. Here you can map each Xray project to its Squish Test Center counterpart.
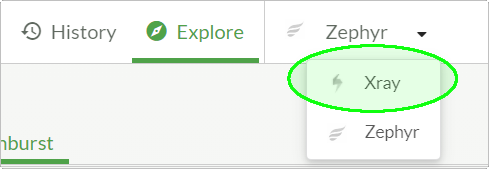
After the integration has been configured, the Traceability View can be reached from the History View (Section 3.3) or Explore View (Section 3.2) of an associated project by selecting Xray via the Traceability Dropdown Button in the upper menu bar.
At first the table is empty. Xray tests can be fetched from the Xray server by clicking the
Pull button in the top right corner of the Traceability View.
If there are a lot of tests or test steps, pulling can take some time. Consecutive pull operations
which are done on the same day will take less time as the progressive pulling mode
is used. (Deleted tests will not be removed from the traceability table,
until a complete pull is performed.)
Switching between complete and progressive pulling is done
automatically (complete pulling is set up to be done once a day).
After the Xray tests have been pulled they can be mapped to
Tests managed by Squish Test Center
using the mapping button in the right most column in the
Traceability View.
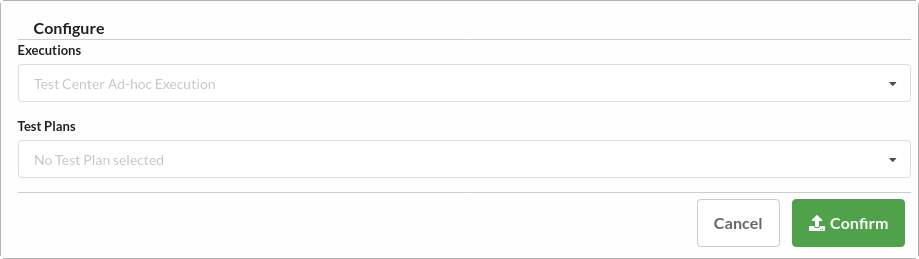
Once the Push button is clicked, a configuration dialog is shown.
Execution and Test Plan can be set by the user
or pushing can be done with default values (Ad hoc execution and no test plan).
 |
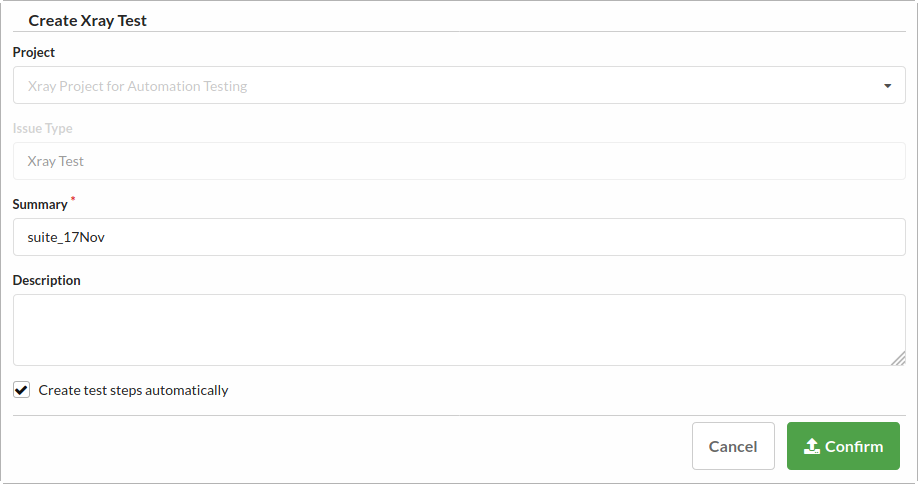
A new Xray test can be created from an existing Squish Test Center test. The test creation can be done from Actions column in the Explore View (Section 3.2). Once Create Xray Test Item is clicked, a modal dialog is shown. A few configuration options are available:
Xray Project (if more than one projects are associated to the same Test Center project)
Summary (which corresponds to the test name displayed in Xray)
Description
Furthermore, you can set the option to Create test steps automatically. This option will not just create the currently selected Squish Test Center Test on Xray, but will also create its children as steps on Xray (e.g. when you create a Xray Test from a Scenario all steps of the Scenario will also be created).
 |