Table of Contents
The QAComplete Integration provides traceability and result synchronization between Squish Test Center and QAComplete. The Integration allows you to map QAComplete Tests and Test Sets to Squish Test Suites and Cases.
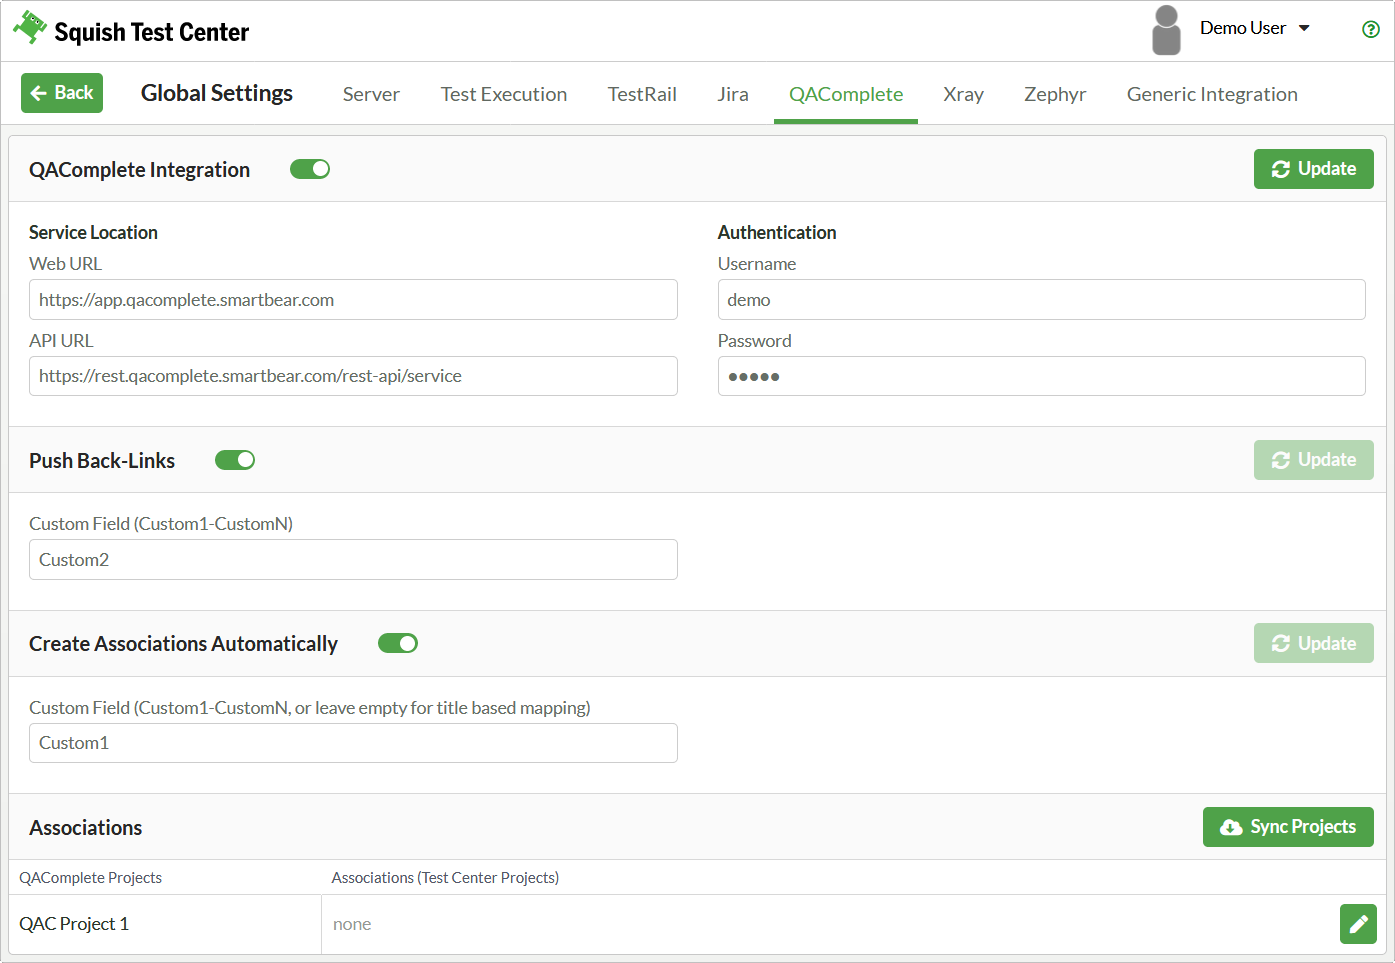
The QAComplete integration settings can be found in the Global Settings menu, this menu is only visible to admin users. The integration can be enabled via the toggle button next to QAComplete Integration.
 |
To establish the connection to QAComplete the following information needs to be provided:
Web URL (For QAComplete SaaS users:
https://app.qacomplete.smartbear.com, for QAComplete on-premises users navigate to the TestLibrary and extract the URL from your browser)API URL (For QAComplete SaaS users:
https://rest.qacomplete.smartbear.com/rest-api/service, for QAComplete on-premises users:[http://your server name]/rest-api/service")Username
Password
Furthermore there are two optional settings:
Push Back-Links: Enable this option to specify a custom field in QAComplete that should be updated with links to the latest Squish Test Center results. This helps to establish traceability between QAComplete and Squish Test Center. The links are updated with each
Pushoperation. The custom fields are not specified by their alias, but by their index combined with the prefixCustomCreate Associations Automatically: When this option is enabled the Integration tries to automatically map QAComplete tests to tests in Squish Test Center. By default tests are mapped by name, but you can also specify a custom field in QAComplete that contains the name of the corresponding Squish Test Center Test (this way you can manage the mapping in QAComplete). On each
PullOperation Squish Test Center tries to update the test mapping for all tests that have no associations.
Use the Update Button to save the entered information.
After all the required data was entered and the Update button was clicked, the QAComplete projects can be fetched by using the Sync Projects button. When the projects are synchronized they will appear in the Associations list of the integration settings. Here you can map each QAComplete project to its Squish Test Center counterpart.
After the integration has been configured the Traceability View can be reached from the History View (Section 3.3) or Explore View (Section 3.2) of an associated project by selecting QAComplete via the Traceability Dropdown Button in the upper menu bar.
At first the table is empty. QAComplete tests can be fetched from the QAComplete server by clicking the Pull button in the top right corner of the Traceability View.
After the QAComplete tests have been pulled they can be
mapped to Tests managed by Squish Test Center
using the mapping button in the right most column in the Traceability View.
If you want to specify specific releases or configurations that should be set for the results pushed to QAComplete, you can do so by setting specific labels when uploading results to Squish Test Center:
Set the
.qac.configurationlabel to the name/title of a configuration in QACompleteSet the
.qac.releaselabel to the name/title of a release in QAComplete
For this to work the name of the configuration or release must not contain any commas.
Furthermore if you're using Test Sets to group Test Cases and there are no Test Suites equivalent to your Test Sets,
then you can use the .qac.testset label to specify a specific Test Set that should be executed
when pushing results to QAComplete