Table of Contents
If you have set up and activated an Integration, Squish Test Center will add it to the list of integrations which are available for selection via the Traceability Dropdown Button (It will appear within the header menu of the Explore or History view, as soon as one or more Integrations have been enabled in the Global Settings). Clicking the Traceability Dropdown Button will take you to the traceability view for the integration that was previously selected via the buttons dropdown menu.

Navigation Bar with Traceability Dropdown Button
If you haven't fetched external projects or mapped them to Squish Test Center projects, the traceability view will greet you with a warning that leads to the Global Settings page for this integration.
![[Note]](images/note.png) | Note |
|---|---|
You have to be an administrator to set up integrations and mappings to foreign projects. Mapping individual items on the traceability page however can be performed by any user. |
 |
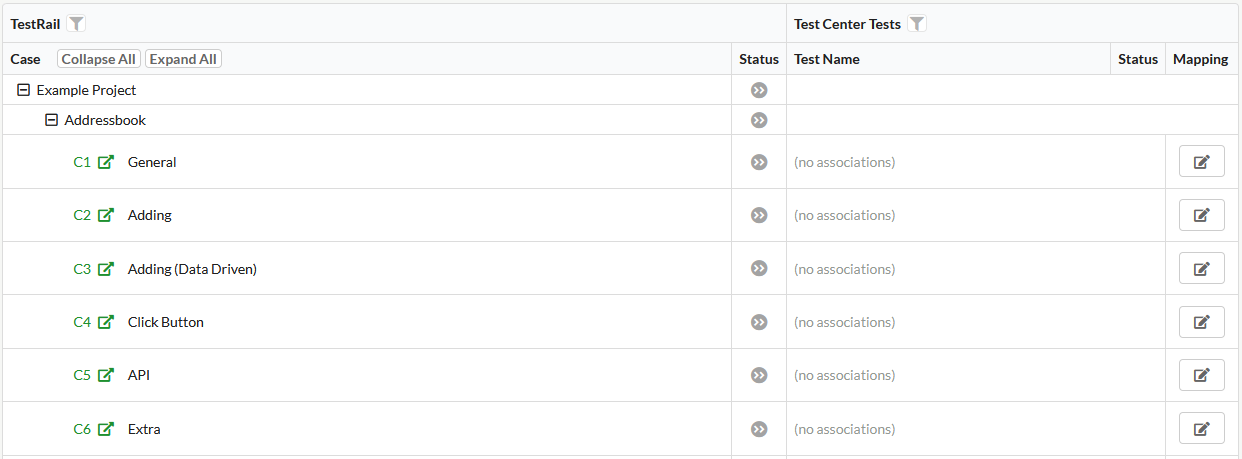
After setting up project associations for your integration, you can fetch mappable items (requirements, tests, etc.) of those projects by clicking the button on the traceability page. Your traceability view should now contain the fetched items from your external system. The traceability table will contain items from the external system on the left and associated Squish Test Center tests on the right. The status of each external item shown on the left is an accumulation of the results of each of the associated tests that were executed in the currently selected batch. Right now there are no associations made, so the table will look relatively uninteresting.
| Note |
|---|---|
The generic traceability might already contain the elements that have been uploaded in the Global Settings. Additional items can be added by clicking the button. |
 |
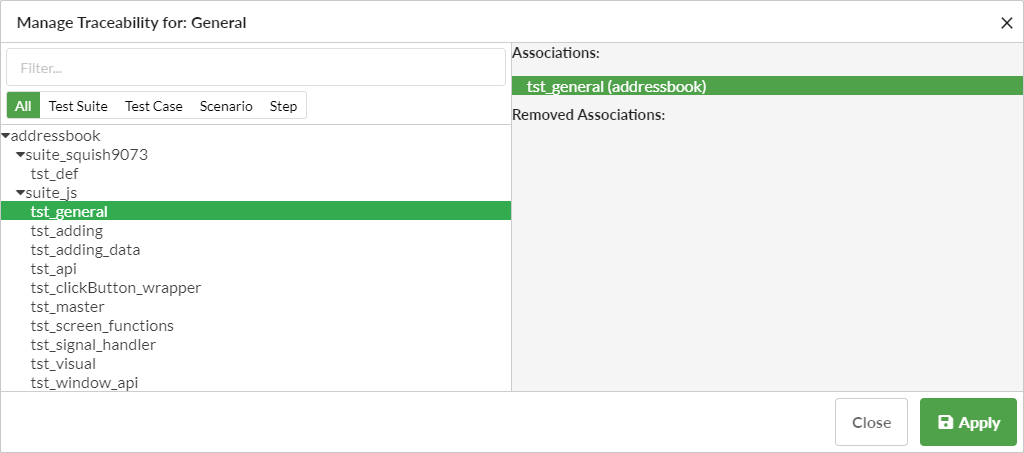
Mapping an integration item to Squish Test Center tests can be done by clicking the button next to it in the Mapping column. After clicking on the button of an item from your integration, you will see a popup in which you can associate Squish Test Center tests by selecting them. You can also select multiple tests from the project you are currently viewing. Clicking on a test below Associations will remove/disassociate it. Click on if you are happy with your current mapping to save it.
 |
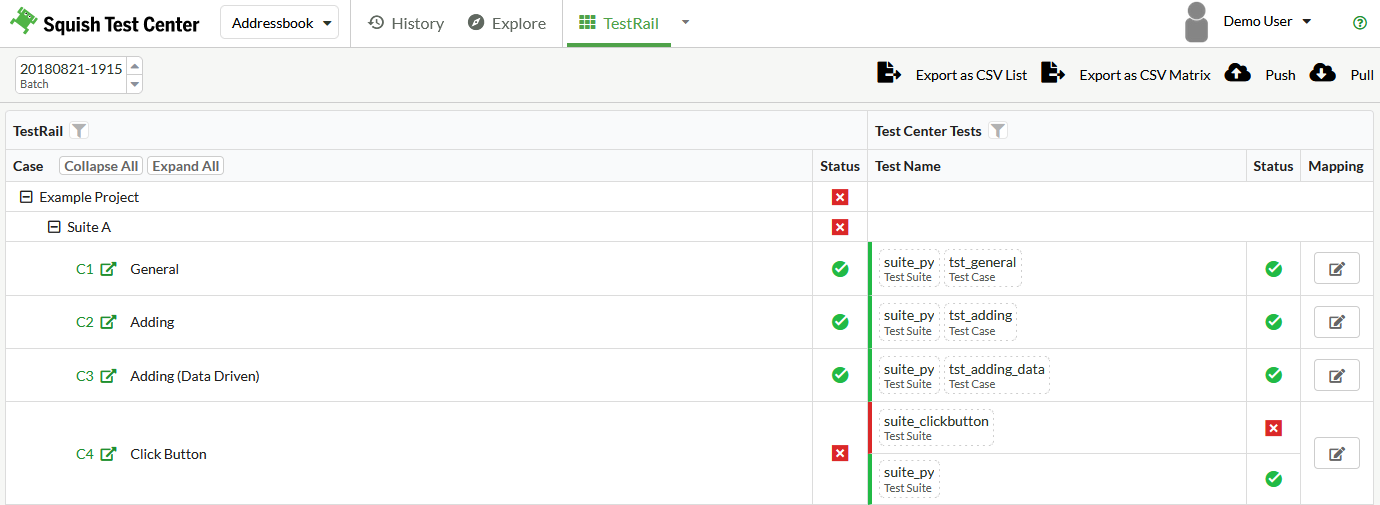
Finally, a traceability view filled with associated items will look something like this:
 |
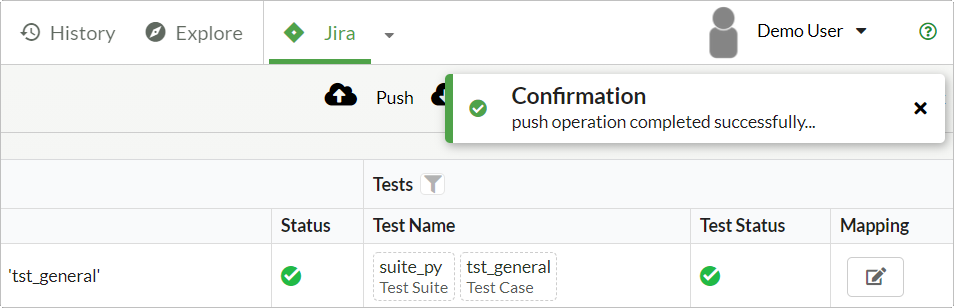
To export the associated test results of the current batch to your external system, press the button. If everything works, you should get a notification saying that the push operation was completed.
You can also export the current mapping and test results in a CSV format to download on to your machine. Select either or depending on your preference.
Optionally a 'Link' button may show up when 'OAuth' is set as authentication method for the integrated platform (can be configured on the platform's related Global Settings page), used for network connections when synchronizing with external resources. For any further information about this read JIRA OAuth Setup (Section 4.4.2.4).
Clicking the filter icons in the traceability table header will reveal the filter options.
 |
You can use the Filter by Project and Filter by Suite filter options to limit the traceability view to items from a specific external project or test suite. To look up traceability items by name or by id the Filter by Text option can be used. You can use the Filter by Result option to find all Requirements for which the associated Tests have failed or have been skipped in the currently selected Batch. Additionally you can use this filter to find all Requirements and Tests that don't have any associations yet.