The plugin can be downloaded from the following URL: https://download.froglogic.com/resources/confluence-testcenter-integration-latest.jar.
Once you have downloaded the plugin, log in to the Confluence platform where the plugin will be installed (admin rights are required) and navigate to the Add-ons system panel.
Select , enter the path to the downloaded
.jar file in the Upload Plugin
dialog which pops up, select 'Upload', and the Testcenter Macro
should be listed within the user installed add-ons list now.
Before the plugin can be used, you will need to configure the Squish Test Center URL used by your Squish Test Center server instance. To configure this, in the Add-ons list, click on the Squish Testcenter Macro plugin. As soon it's details view shows up, click the button (beside and ). Now the Configuration Page: Squish Testcenter Macro should open up.
The simplest way for setting up the plugin is to have all user accounts which are created on your Testcenter server, using always exacly same email addresses for their Squish Test Center account names as which they also have registered as their email adresses within their Confluence accounts.
If that's the case, only thing it needs for setting up the plugin is to have the URL of your Testcenter server configured then:
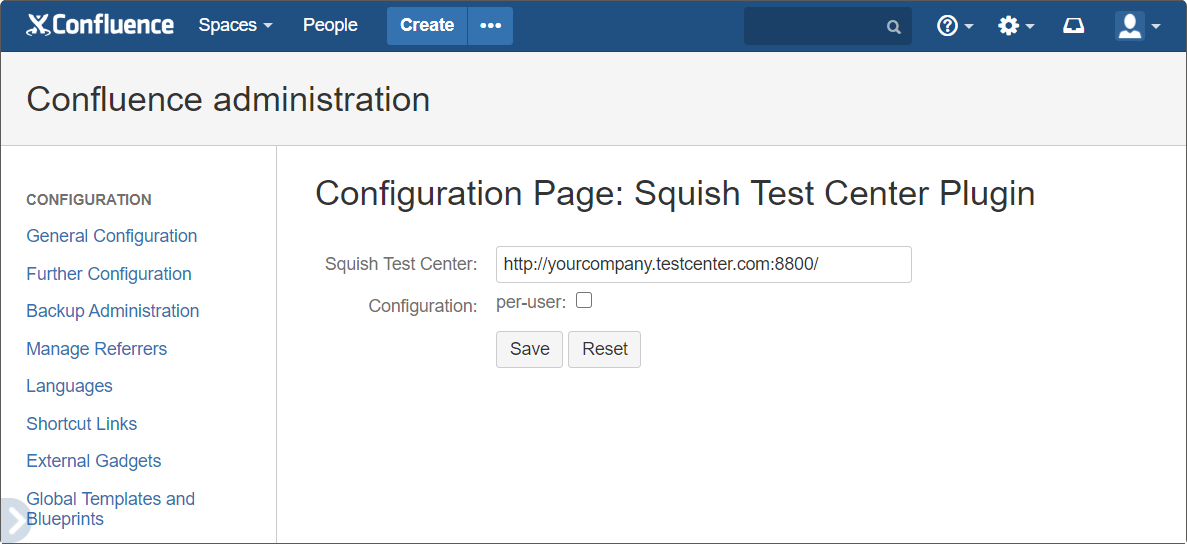 |
Enter the URL of your Test Center server in the Squish Test Center field and press the button
If all user accounts in Testcenter using names identical to their Confluence account's email addresses, everythings is done now and the Squish Testcenter Macro is ready to use.
![[Note]](images/note.png) | Note |
|---|---|
Before logged in users can see any test results which had been written by using the Squish Test Center macro, they need to 'activate' it by entering valid login to the related Squish Test Center account before. As long a user has not activated the plugin usage for the own account, the macro will show a 'PasswordRequired' message then instead of any test result. For activating the plugin, a user at first needs to click the 'PasswordRequired' message to get prompted for the password to the users related acount on the Squish Test Center server. Once a user has entered the correct password, the plugin will turn into its regular state and will show up from now on latest results of tests which are stored on testcenter. |
By using the plugin, you can refer to some distinct test suite which is managed by
your server. Any occurrences of the word {Testcenter}
within Confluence pages will now be replaced the the latest result outcomes
("PASS", "FAIL", "WARN"). Tests can be defined for each instance individually,
where 'instances" here is meant to be occurrences of the word
{Testcenter} on the page.
To define a certain test to be looked up, edit the Confluence page:
type:
{Testcenter}hover and click the
{Testcenter}macro (now contained in a macro-instance box)a menu will pop up - select to open the Macro dialog
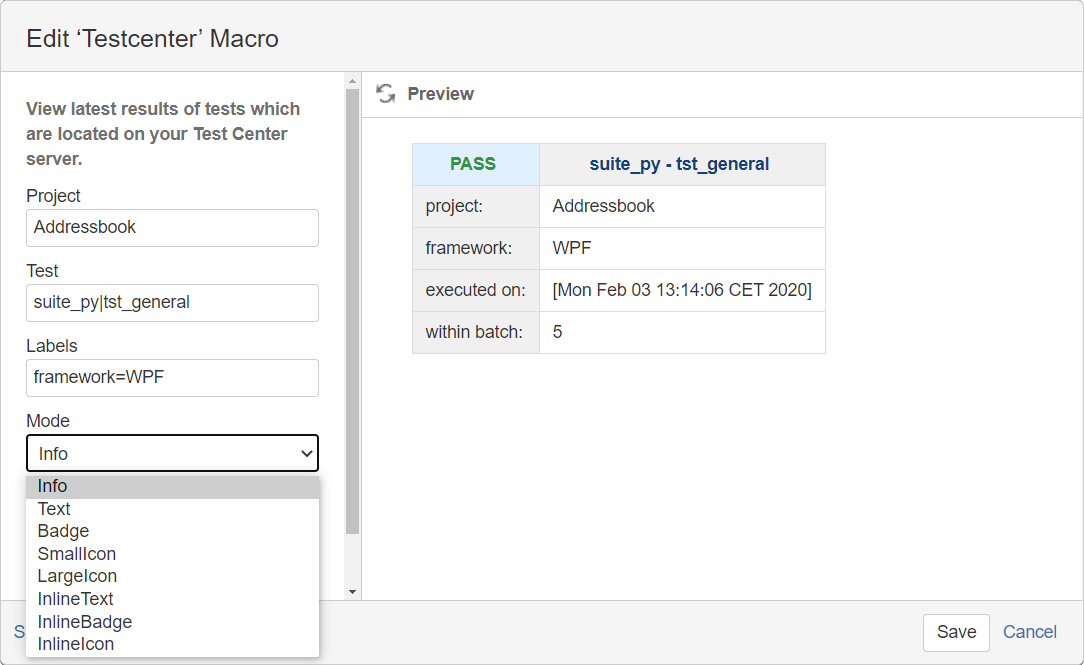 |
Below is a description of the fields in the dialog and how to use them.
- Project (*must be filled) - Synopsis: projectname
Defines within which Test Center defined project the macro should do lookup for latest results of tests which the next parameter ('Test' - see below) defines.
- Test (*can be left blank) - Synopsis: testsuite|testcase|feature|scenario
When 'Test' parameter field is left blank, the macro then shows up by indicating a
'whole project'overview.Which means:
Project is failed (: In cases where any single test contained in 'project' was a FAIL. )
)Project is warned (: If maybe no test run has failed actually, but if any kind of WARNING came up. )
)Project is passed (: If ALL tests logged just PASS results, and not a single FAIL or WARN was logged. )
)
To create lookup for distinct test suite's latest result outcomes, this can be selected by giving the test suite's name as parameter to the 'Test' field.
The same way, for linking to a single test case of a suite, a BDD feature or even a single Scenario within a feature, these then can be appended, each after another, separated by '|' signs.
- Labels (*can be left blank) - Synopsis: label1=value1,label2=value2,...
Does lookup that test which the 'Test' field parameter defines, but filtered by a list of given labels, coma separated, each given in a form: 'labelname=labelvalue'.
- Mode (selectable mode value) - One of the following modes can be chosen:
Info: shows additional information beside the test outcome: test name, labels (if any defined) and a timestamp of the test's last execution date.Text: shows the test outcome only, as a link to that test run on the serverBadge: shows the link as a 'Status Badge' in either red, green or yellow, according to the test's result outcomeSmallIcon: shows a small icon indicating the result (useful for placement in Table cells) as a link to the run on the serverLargeIcon: shows a large icon indicating the result as a link to the run on the serverInlineText: shows latest result inline, within floating text contents, as colored link to the testInlineBadge: shows as 'Status Badge' usable inline within floating textsInlineIcon: shows an inline 'result icon' which can be used like emojis within floating text contents